Quick Start
Hover automates existing USSD sessions in the background of Android applications.
Our Android SDK can run virtually any USSD interaction on any mobile operator globally. This includes mobile money payments, banking services, airtime topup, bill pay, bundle purchases, and more. Hover enables developers to make USSD-based services more accessible to users with visual impairments or impairments related to literacy or numeracy.
Prerequisites
- Target Android API level 18 or higher.
- A USSD service you wish to integrate.
- A SIM card that can dial the USSD service.
-
If you are new to Android or starting your app from scratch, we have a pre-configured app on Github that can help you more quickly test and customize Hover. Follow the instructions in the README to get started.
1. Create an Action
Actions instruct the Hover SDK how to integrate with a USSD service. To create actions sign in to your Hover account then go to the actions tab and click on + New Action
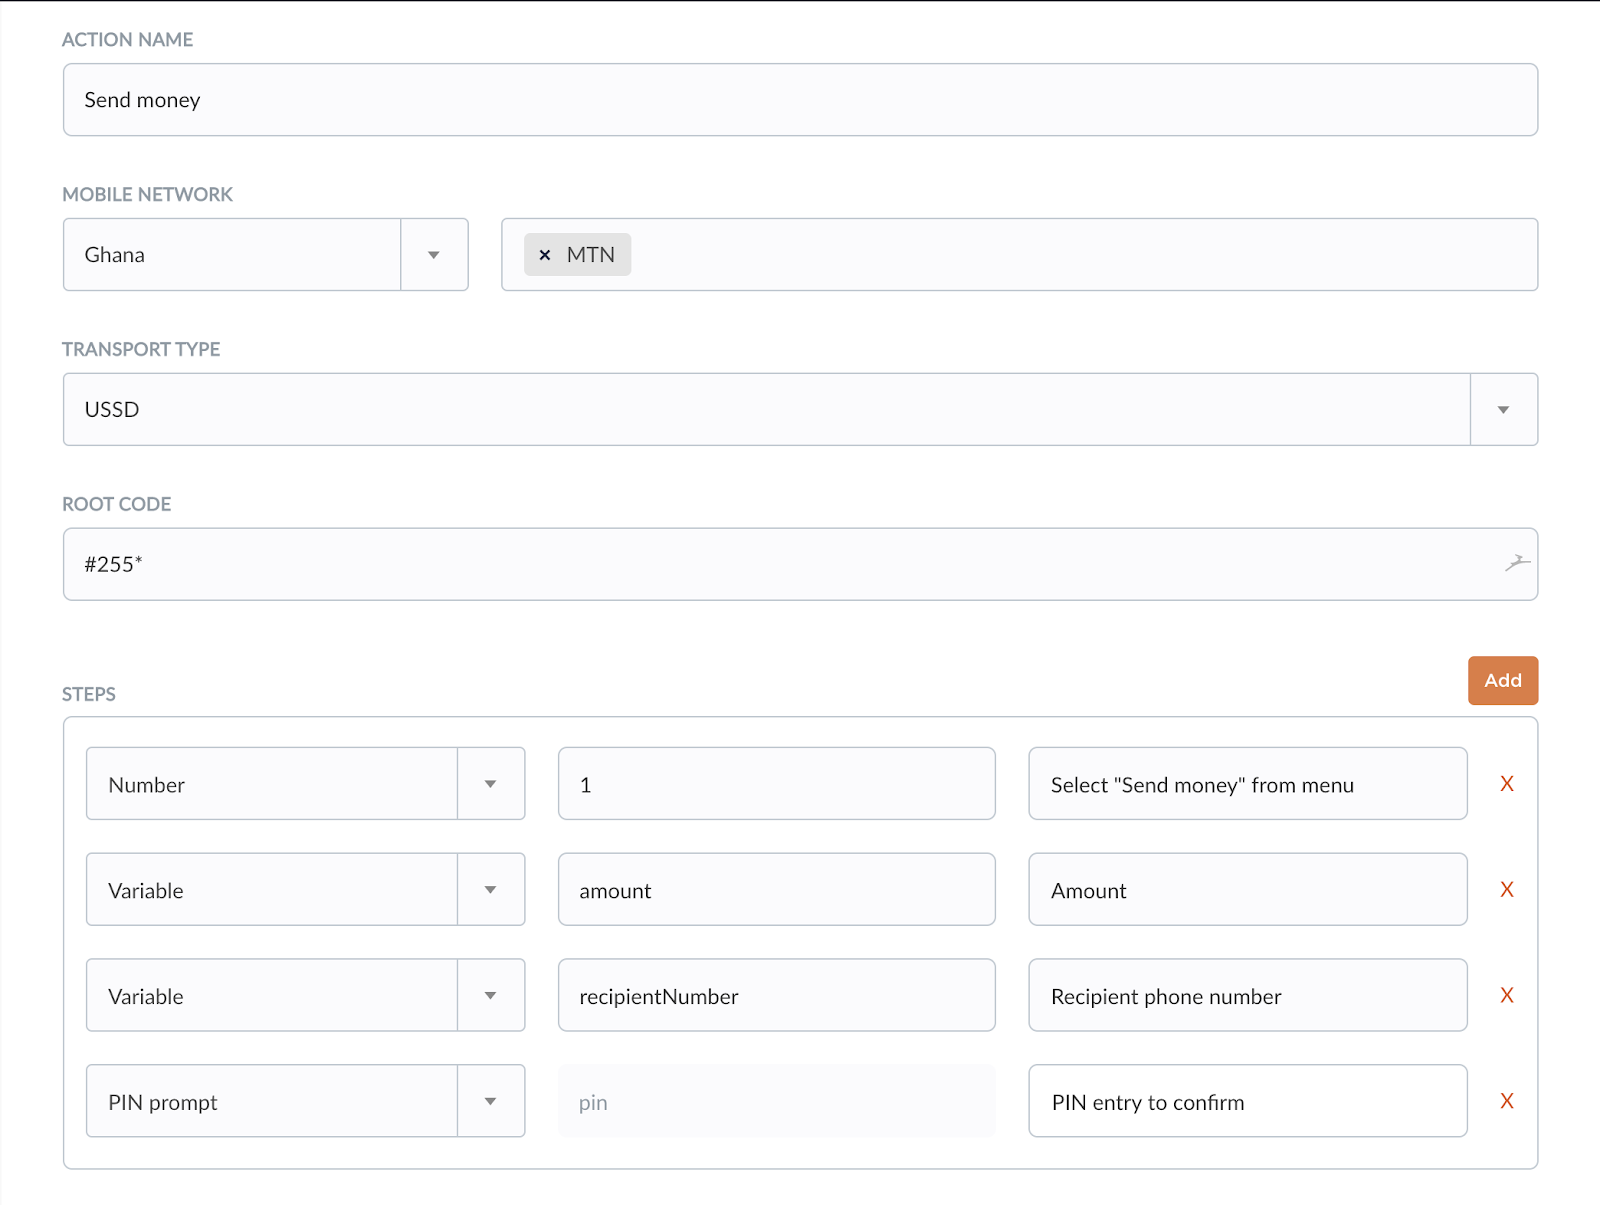
Actions consist of
- Name of your choice, for example “Send Money”.
- Mobile networks/SIM cards that can run the USSD service.
- Root code, the shortcode used to dial the USSD service.
- The USSD menu steps. See below.
Your configuration should look something like this:

Steps can be one of three types
- Numbers for constant choices such as entering “1” to reach My Account.
- Variables for entries that change at runtime, such as amount to be sent.
- PIN prompt to display a PIN entry for the user.
- Press OK for menus where no choice or entry is made.
2. Install the SDK
As of the current version of the Hover SDK is
Create an App
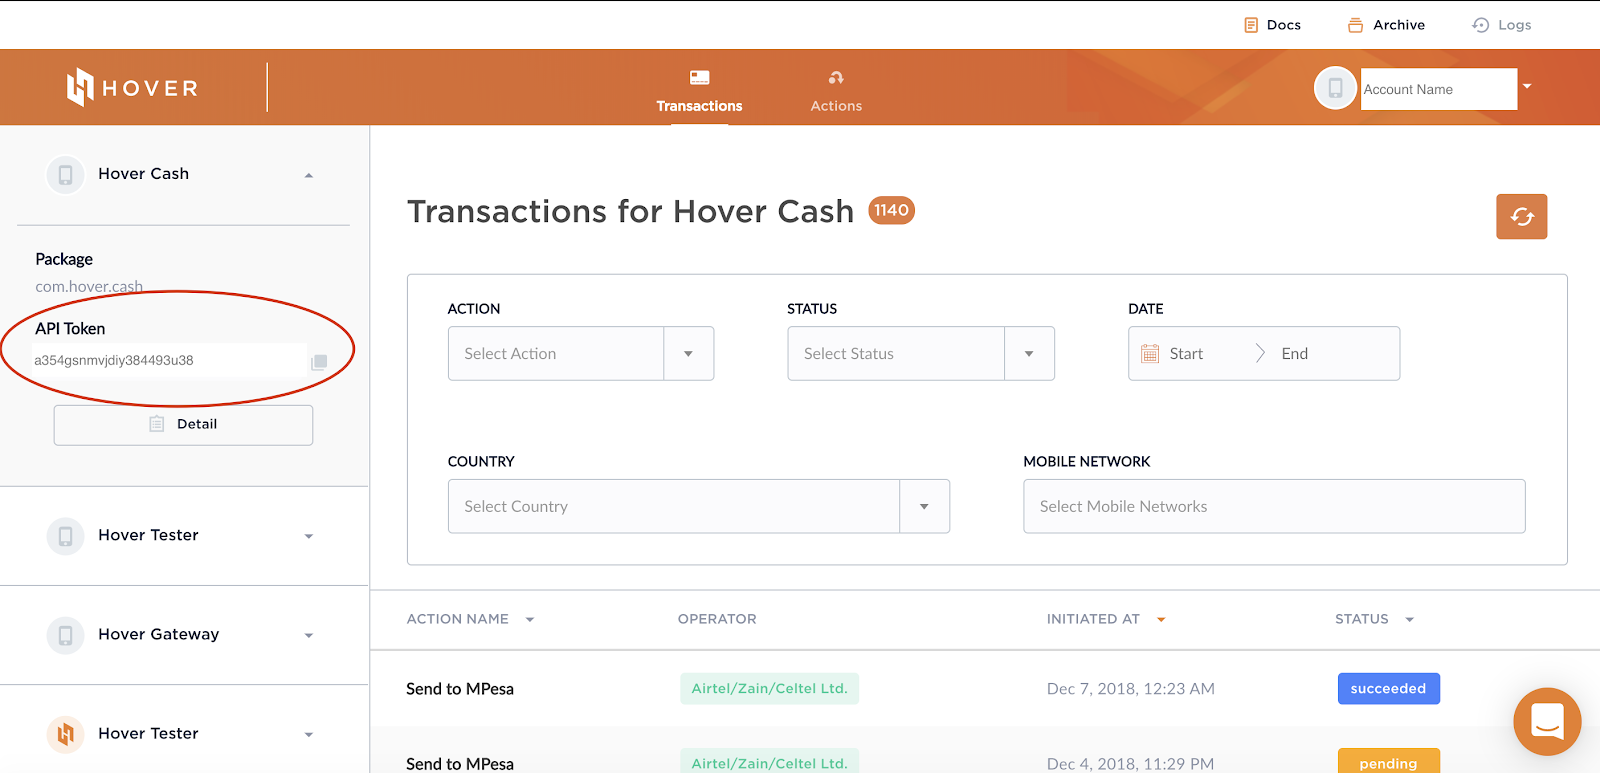
Create an API key for your app by clicking “New app” on the left side of your dashboard. Enter the app name, package name, and an optional webhook url. The package name MUST match the applicationId found in your app-level build.gradle file.
After you click save the new API token can be found under your app’s package name in the left-side of your dashboard:

Add the Hover repo to your root build.gradle repositories:
allprojects {
	repositories {
		...
		google()
		maven { url "http://maven.usehover.com/releases" }
	}
}
Add the SDK to your app-level build.gradle dependencies:
dependencies {
	...
	implementation 'com.hover:android-sdk:'
}
Include your API token in your AndroidManifest.xml:
<application>
    ...
    <meta-data
        android:name="com.hover.ApiKey"
        android:value="<YOUR_API_TOKEN>"/>
</application>
Initialize
Your actions are downloaded and the SDK is initialized by calling Hover.initialize(). This needs to be done once, ideally in your main launch activity. Please do not do this in your Application class.
import com.hover.sdk.api.Hover;
...

public class MainActivity extends AppCompatActivity {
...
	@Override
	protected void onCreate(Bundle savedInstanceState) {
		super.onCreate(savedInstanceState);
		...

		Hover.initialize(this);
	}
		...

}
3. Run your Action
Make the USSD request
When the user clicks a button or takes another action, start the USSD session. Specify the action_id, and names and values for any variables.
Button button= (Button) findViewById(R.id.action_button);
button.setOnClickListener(new View.OnClickListener() {
	@Override
	public void onClick(View v) {
		Intent i = new HoverParameters.Builder(this)
			.request("action_id")
			.extra("step_variable_name", variable_value_as_string) // Only if your action has variables
			.buildIntent();
		startActivityForResult(i, 0);
	}
});
The Hover SDK will only run an action on a SIM card of the network(s) it is configured for. We provide helper methods for checking a user’s SIMs; see using actions for details.
Get information about the session
Implement onActivityResult() to get the content of the session. If the resultCode is RESULT_OK then as far as the SDK can tell the request was accepted and is being processed by the USSD operator. If the result code is RESULT_CANCELED then something went wrong and you should not expect the request to succeed. In this case the data intent returned will have a String Extra called error which will contain the error message.
@Override
protected void onActivityResult (int requestCode, int resultCode, Intent data) {
	if (requestCode == 0 && resultCode == Activity.RESULT_OK) {
		String[] sessionTextArr = data.getStringArrayExtra("session_messages");
		String uuid = data.getStringExtra("uuid");
	} else if (requestCode == 0 && resultCode == Activity.RESULT_CANCELED) {
		Toast.makeText(this, "Error: " + data.getStringExtra("error"), Toast.LENGTH_LONG).show();
	}
}
4. (Optional) Parse the Result
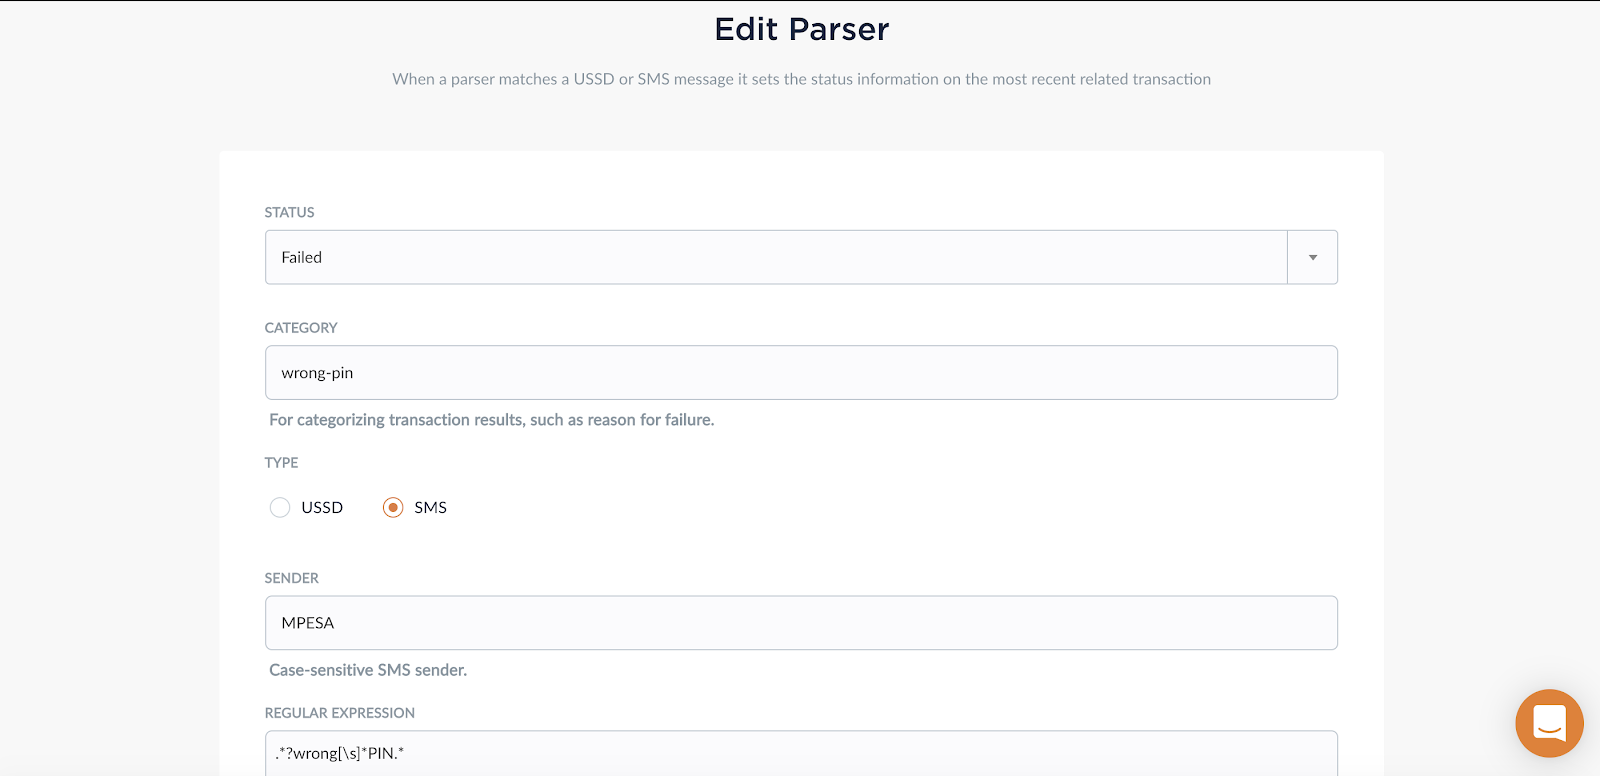
To categorize transactions as “succeeded” or “failed”, you can parse the final USSD or SMS message using a regular expression. Hover provides a number of helpers for parsing the content and result of a USSD session, or you can do it yourself. To use Hover’s parsers add a parser to an action, set the status you want assigned to this particular type of result (e.g. status: “failed”, category: “wrong PIN”) and write the regular expression for the message as it appears in the final SMS or USSD message.

See parsing for more.